Did you know you can get a ticket if your taillights are broken, fogged, or faded? And if your car is due for an inspection and you have a broken taillight forget about it!
In NYC, you are given a chance to get it fixed, and once fixed, you have to mail the DMV the receipt or go to a police precinct to show them the completed job. If you want to avoid this unnecessary headache, just follow these steps.
Get to your mechanic as soon as possible and get the taillight repaired or follow the DYI method below.
Fix It Yourself
Tools and Materials Needed:
- New taillight bulbs or assemblies (check your vehicle’s manual for the specific type of bulbs or assemblies you need).
- Screwdriver (usually Phillips or flat-head, depending on your vehicle).
- Gloves (optional, but recommended to prevent getting oil or dirt on the bulbs).
- Safety glasses (optional, but recommended to protect your eyes).
Steps to Replace Vehicle Taillights:
- Ensure your vehicle is parked on a level surface and turned off. Engage the parking brake for added safety.
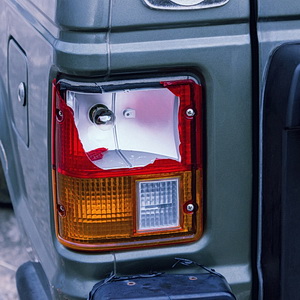
- Locate the Taillight Assembly: Open the trunk or rear hatch, and locate the taillight assembly that you need to replace. The assembly may be behind a panel or accessible from inside the trunk.
- Remove Screws or Fasteners: In most cases, you’ll need to remove screws or fasteners that secure the taillight assembly to the vehicle’s body. These screws are typically located around the perimeter of the taillight. Use the appropriate screwdriver to remove them.
- Remove the Taillight Assembly: Once the screws are removed, gently pull the taillight assembly away from the vehicle. Be careful not to force it, as some assemblies may have tabs or clips that need to be disengaged first.
- Access the Bulbs: With the taillight assembly removed, you can access the bulbs. Depending on your vehicle, there may be multiple bulbs in a single assembly. Identify the specific bulb you need to replace.
- Remove the Old Bulb: Twist the old bulb counterclockwise to remove it from the socket. If you’re replacing the entire assembly, skip this step.
- Insert the New Bulb: Carefully insert the new bulb into the socket, making sure not to touch the glass part of the bulb with your fingers, as this can lead to premature bulb failure. Use gloves or a clean cloth if necessary.
- Secure the Taillight Assembly: If you’re only replacing a bulb, skip this step. If you’re replacing the entire taillight assembly, carefully align it with the vehicle’s body and push it into place. Reinstall the screws or fasteners and tighten them securely.
- Test the Taillights: Turn on your vehicle’s lights to ensure the new taillight bulbs are working correctly. Check the turn signals and brake lights as well.
- Reassemble and Close: If you had to remove any interior panels or trunk lining to access the taillight assembly, reassemble them. Close the trunk or hatch.
- Dispose of Old Bulbs Properly: If the old bulbs are incandescent, they may contain hazardous materials. Dispose of them according to local regulations, which may involve taking them to a recycling center.
Remember to consult your vehicle’s manual for specific instructions and recommended bulb types for your make and model. Additionally, if you’re uncomfortable with any step or if your vehicle has unique requirements, consider seeking professional assistance from a mechanic or an auto service center.